 Wingware
Tutorial: Using AI Agents

In this part of the tutorial, we build a small Flask web app - a personal bookmarks manager - from scratch.
To get started, set up an empty project for it now. You will need to navigate back to the Tutorial in the Help menu after creating your project, or you can view this page on the website:
- From the Project menu, choose New Project.
- Select Create New Directory, enter a Name, select the Parent Directory, use unittest for Test Framework, and select Project Type of Flask.
- Also select Set Up for Claude Code. This enables the Claude Code integration, which tells the AI agent how to work with Wing's AI agent user interface, and how to access its code analysis, debugging, testing, and version control features.
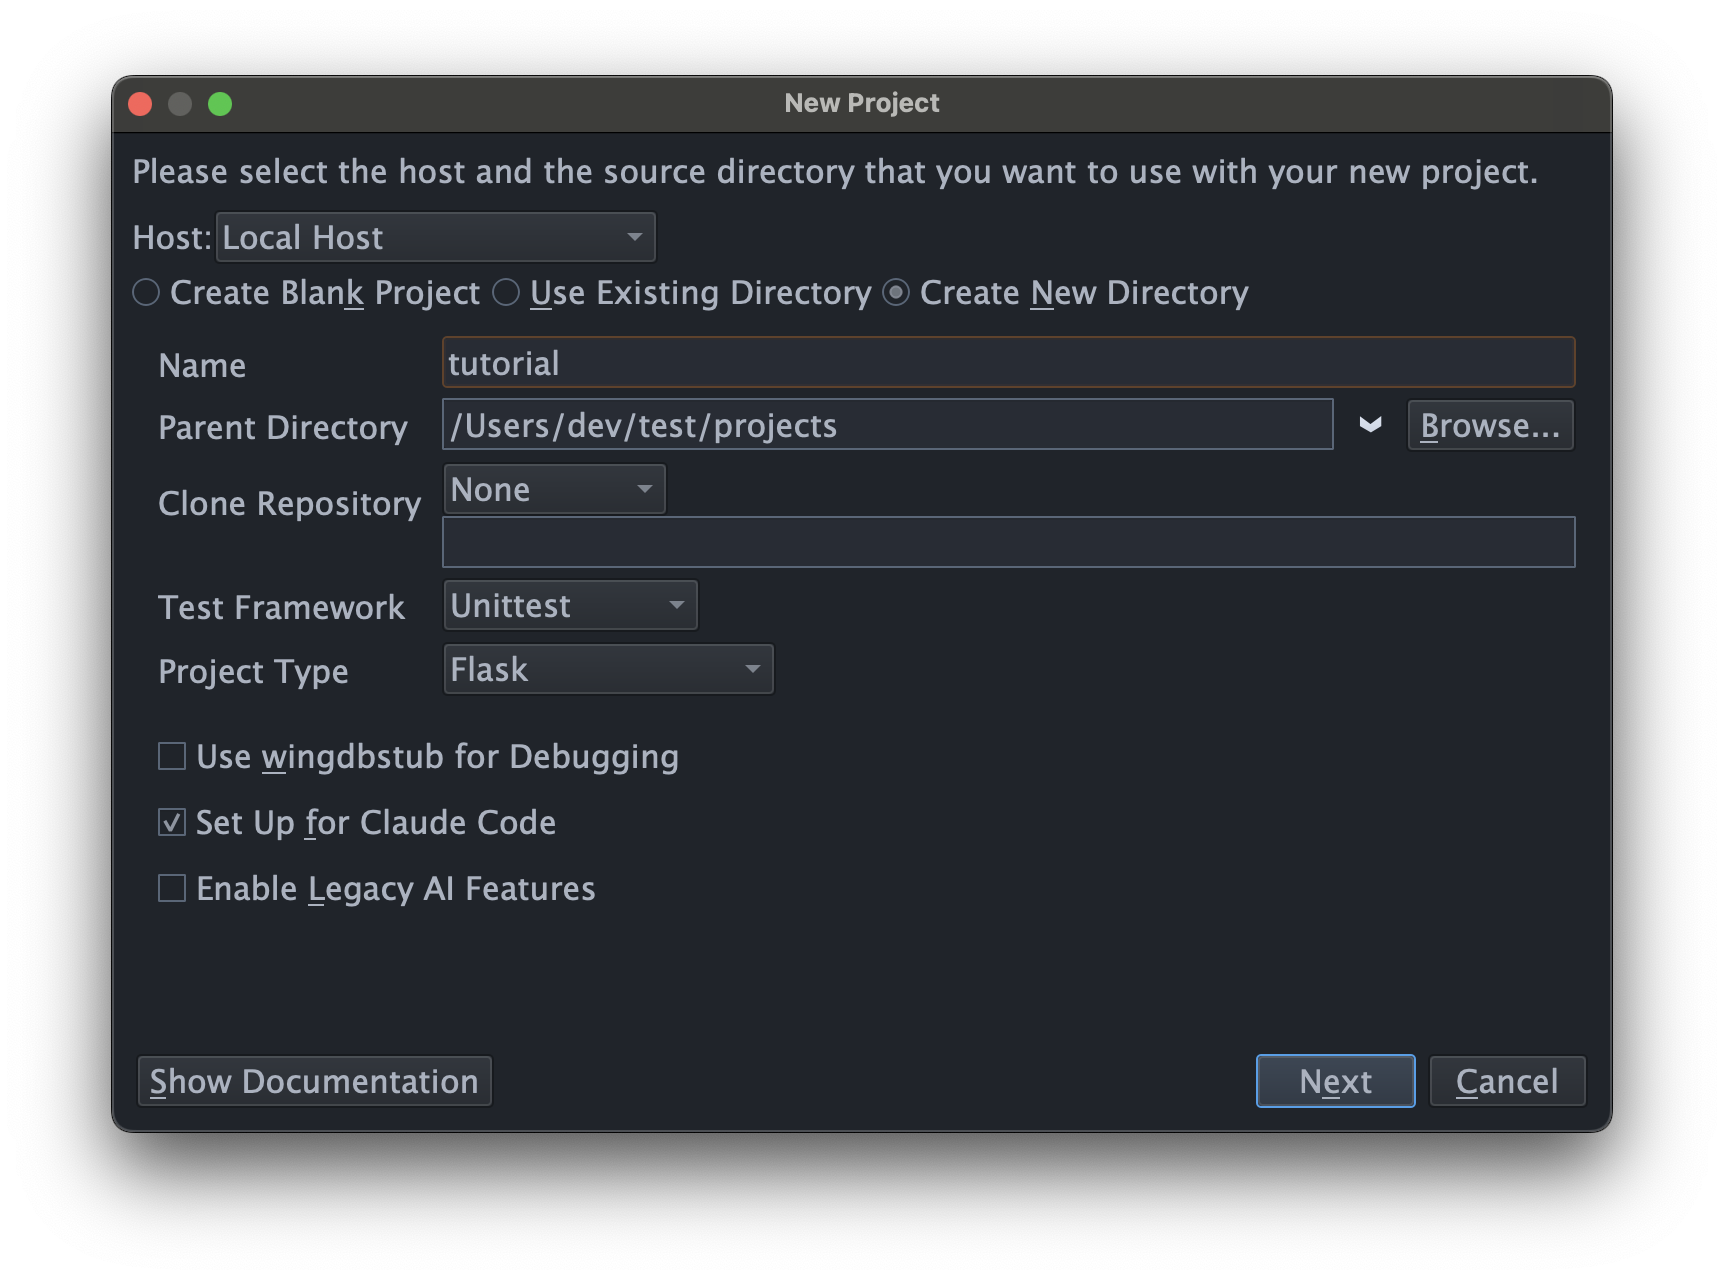
- Then click Next and select Create New Environment with type virtualenv (or any other that you prefer). Press Create Project to create and configure your project.
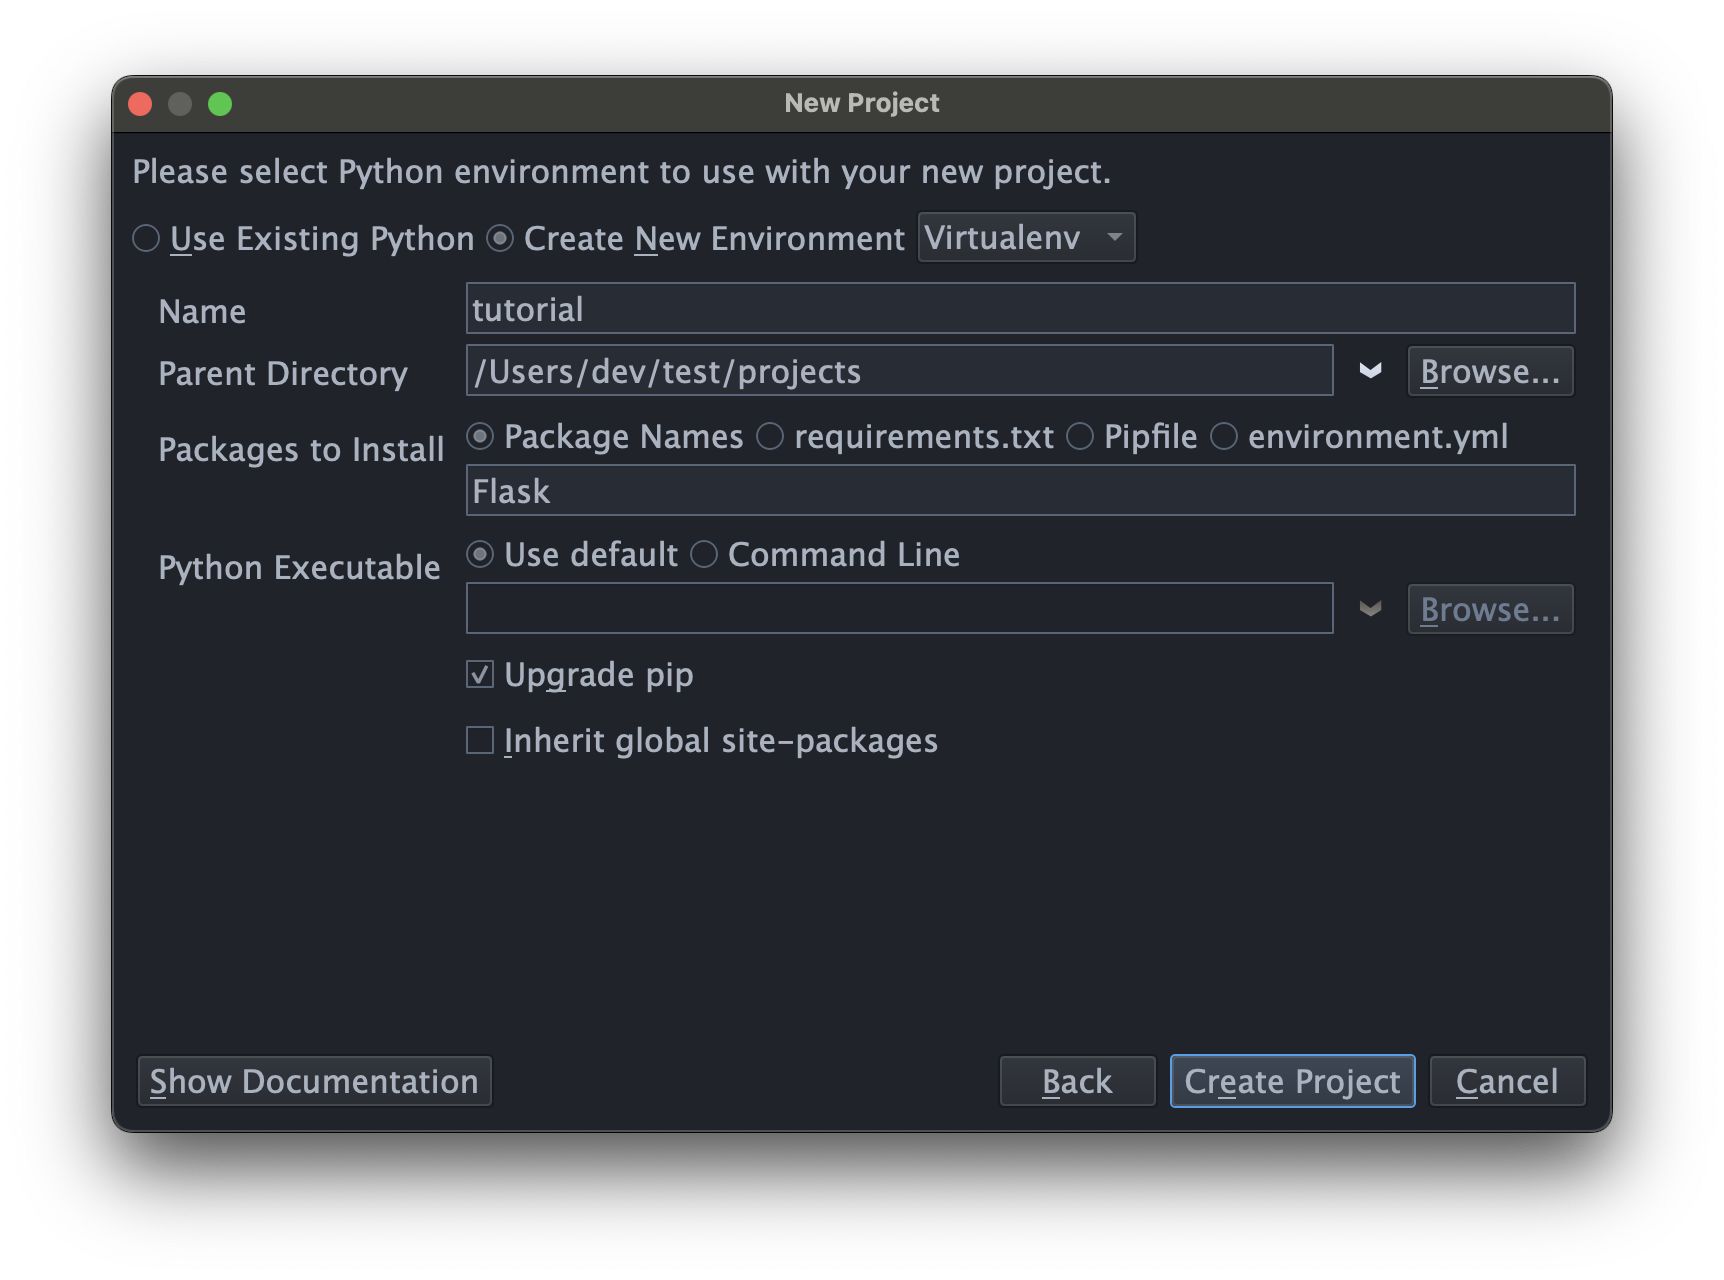
Wing will create the directory, build the venv, install Flask, and open the project with the Tasks tool on the left and the Claude Code tool on the right.
The first time you submit a task, Claude Code will prompt you to authenticate against your account, if you have not already done so outside of Wing.
You may also need to tell Claude Code that you trust the current directory (the one you just created with your project) and approve using Wing's MCP servers, which provide Claude Code with access to Wing's functionality.
Section Contents