 Wingware
Tutorial: Classic IDE Features
This part of the tutorial takes you through Wing's classic IDE features, originally designed for human users before the advent of AI agents. Let's start with some basics that will help you get around Wing.
Wing's user interface is divided into an editor area and two toolboxes separated by draggable dividers. Try pressing F1 and F2 now to show or hide the two toolboxes. Also try Shift-F2 to maximize the editor area temporarily, hiding both tool areas and toolbar until Shift-F2 is pressed again.

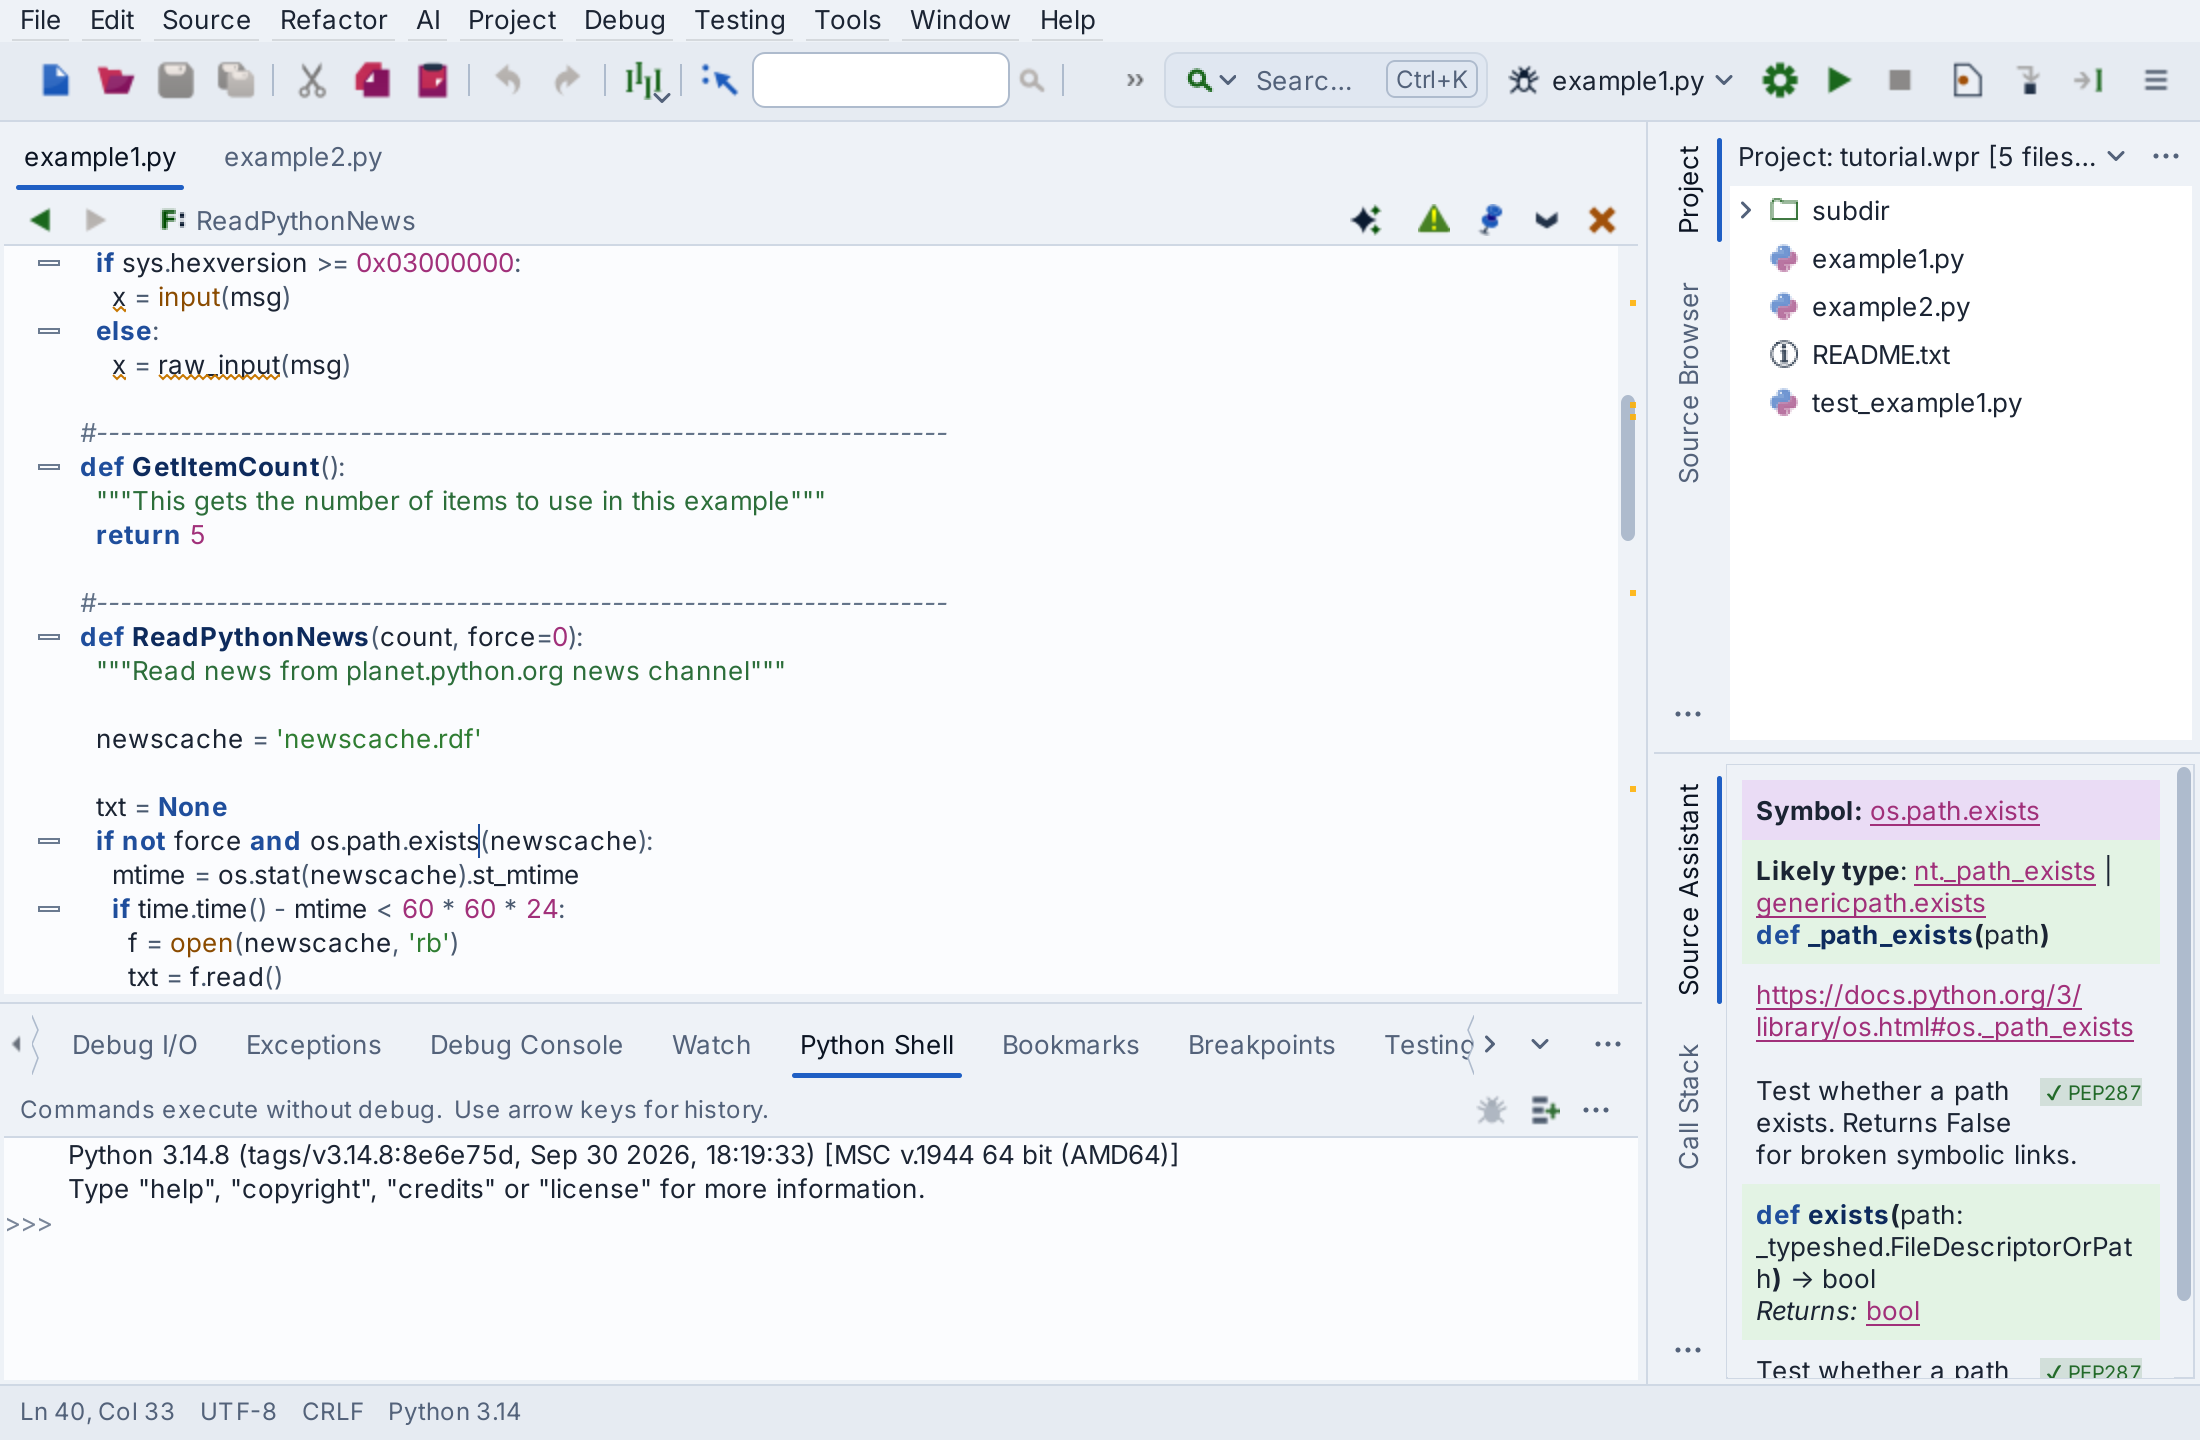
Tool and editor tabs can be dragged to rearrange the user interface, optionally creating a new split or moving them to a separate window. Right click on the tabs for a menu of additional options, such as adding or removing splits or to move the toolbox from right to left. The number of splits shown by default in toolboxes will vary according to the size of your display.
Notice that you can click on an already-active tool tab to minimize that tool area. Click again on any tab to restore the toolbox to its previous size.
See User Interface Layout for details.
The Toolbar Search Field
The search field near the right end of the toolbar finds files, commands, tools, preferences, and documentation by name. Try this now by pressing Ctrl-K (or Command-K on macOS) and typing split. Notice that the matching commands are listed with their menus and key bindings, so this is also a good way to learn where things are. Press Esc to return to the editor. Once we've set up a project later in this tutorial, you can also use the search field to open the project's files.
The Run, Debug, and Stop icons after the search field run or debug your code. Hover the mouse over them to see their names. We'll use these later in the tutorial.
This tutorial assumes that Wing is using the Modern user interface look, which is the default. If your Wing looks different, the Classic look may be selected in Preferences. See User Interface Look for details.
Context Menus
In general, right-clicking provides a menu for interacting with or configuring a part of the user interface. On some systems you may need to configure your track pad to allow right-clicking, or use a keyboard modifier to emulate a right mouse click.
Splitting the Editor Area
Splitting your editor area makes it easier to get around this tutorial. To do this now, right-click on the editor tab area and select Split Side by Side. On small monitors and laptops, it may be preferable to create a new window for the tutorial by right-clicking on its tab and selecting Move Wing Help to New Window.
By default, the editor shows all open files in all splits, making it easy to work on different parts of a file simultaneously. This can be changed by unchecking Show All Files in All Splits in the right-click context menu on the editor tabs.
Configuring the Keyboard
Use the Edit > Keyboard Personality menu to tell Wing to emulate another editor, such as Visual Studio, VI/Vim, Emacs, Eclipse, XCode, MATLAB, or Brief.

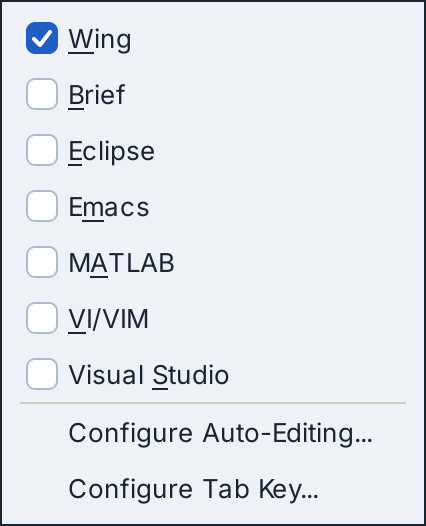
The Configure Tab Key item in the Edit > Keyboard Personality menu can be used to select among available behaviors for the Tab key. The default is to match the selected Keyboard Personality.
When the Keyboard Personality is set to Wing, Tab acts differently according to context. For example, if lines are selected, repeated presses of Tab moves the lines among syntactically valid indent positions. And, when the caret is at the end of a line, pressing Tab adds one indent level.
See Keyboard Personalities for details.
Accessing Preferences
Preferences for controlling how Wing Pro looks and behaves are available from the Edit > Preferences menu item (or Wing Pro >> Preferences on macOS). Try this now so you will remember how to bring up the preferences dialog as you work through the rest of this tutorial. However, it's best not to delve into all of the available options right away. The next few sections will highlight some of the more important ones that are worth looking at now.
Auto-Editing
Wing implements a variety of auto-editing operations, which are designed to speed up typing and reduce common errors. A subset of the available operations that does not require learning different keystrokes is enabled by default. For example, when ( is typed Wing will enter the closing ) automatically. If the closing ) is pressed anyway, Wing just skips over it. Auto-editing can be disabled as a whole using the Auto-editing > Typing > Auto-Editing Enabled preference or individual operations can be selected.

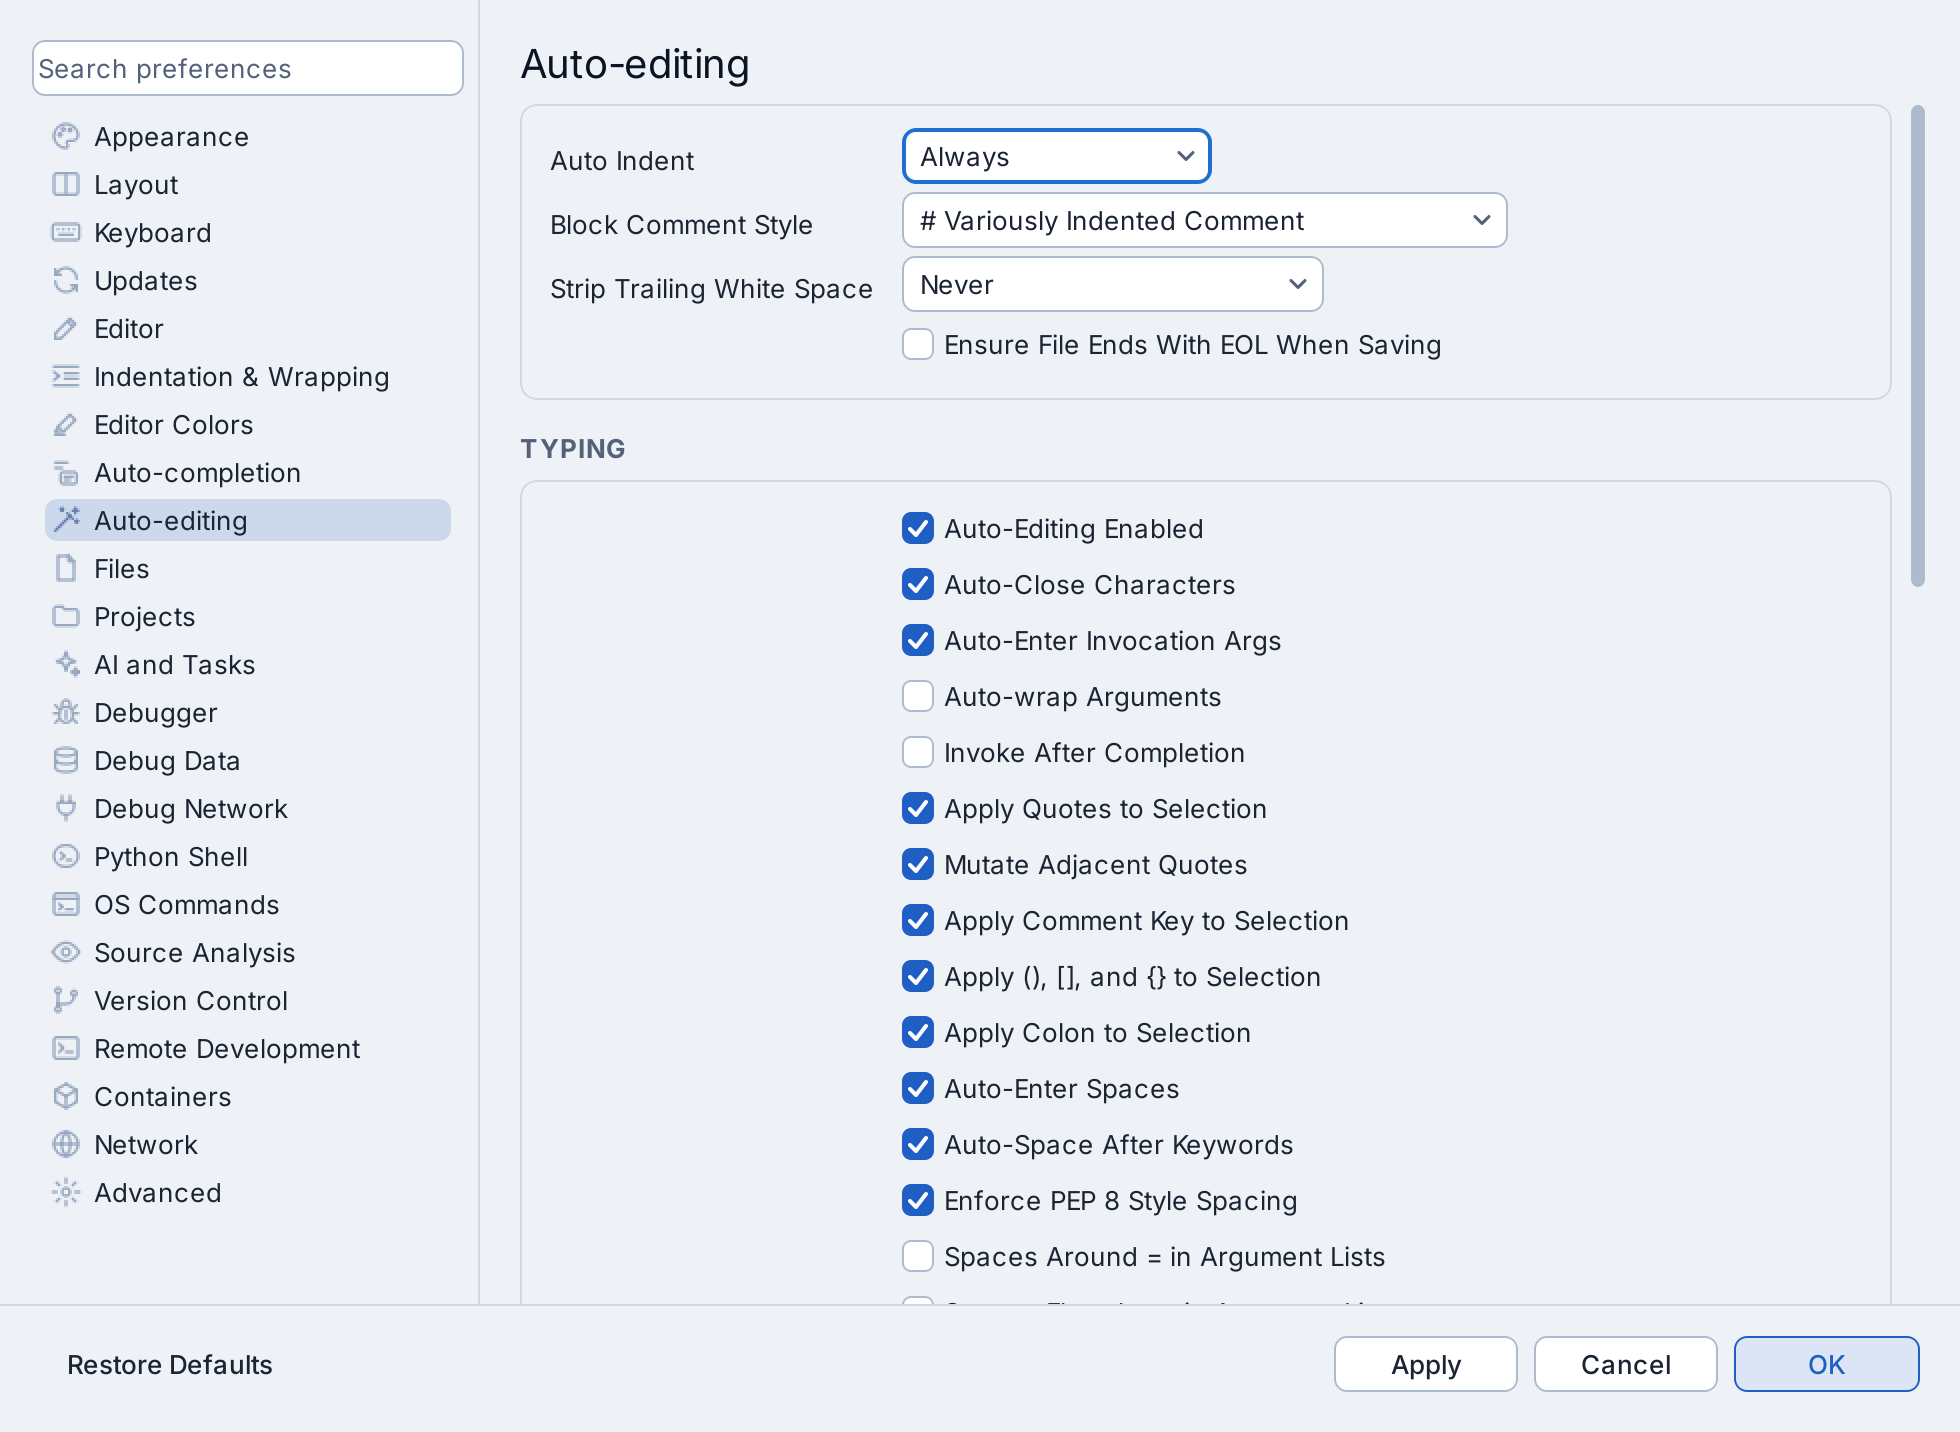
This topic will be covered in more detail later in the tutorial.
Auto-Completion
There are many options for Wing's auto-completer. These are set in the Auto-completion preferences group. For example, if you want to use the Enter key for completion, you may wish to select that now in the Auto-completion > Completion Keys preference.
Colors and Dark Mode
The default display mode on Windows and macOS is to use the light or dark theme as the OS is set, tracking the OS's light or dark display setting as it changes. On Linux, Wing cannot tell the OS setting and instead uses a dark display theme by default. On Windows and macOS, the Appearance > Look > User Interface Look preference can also be set to emulate the native look for the OS as much as possible.
The colors for the user interface can be selected with the Appearance > Display Mode, Appearance > Light Theme and Appearance > Dark Theme preferences.
The colors used in editor areas and some of the tools, including the Python Shell, can be set independently with the Appearance > Light Theme > Light Editor and Appearance > Dark Theme > Dark Editor preferences.
The following screenshot was created by setting Display Mode to Use Dark Theme and selecting One Dark for the Dark Display Theme:

The other screenshots in this tutorial use the default Night Flight dark theme, or Solo Flight where the documentation is shown in a light theme.
Other Configuration Options
To set the fonts in the user interface and editor, change the Appearance > Text > UI Font, Appearance > Text > UI Font Size and Appearance > Text > Editor Font/Size preferences.
The size and type of tools used in the toolbar at the top of Wing's window can be changed by right-clicking on one of the enabled tools.
For more information on adjusting the user interface to your needs, see Customization.
Section Contents
4.1. Tutorial: Check your Python Integration
4.2. Tutorial: Setting Python Path
4.3. Tutorial: Version Control Systems
4.4. Tutorial: Code Warnings
4.5. Tutorial: Unit Testing
4.6. Tutorial: Debugging
4.6.0. Tutorial: Execution Environment
4.6.1. Tutorial: Debug I/O
4.6.2. Tutorial: Debug Process Exception Reporting
4.6.3. Tutorial: Interactive Debugging
4.6.4. Tutorial: Debugging from the Python Shell
4.6.5. Tutorial: Debugging Code Not Launched by the IDE
4.6.6. Tutorial: Other Debugger Features
4.7. Tutorial: Refactoring
4.8. Tutorial: Introduction to the Editor
4.9. Tutorial: Navigating Code
4.10. Tutorial: Other Editor Features
4.11. Tutorial: Auto-Editing
4.12. Tutorial: Indentation Features
4.13. Tutorial: Turbo Completion Mode
4.14. Tutorial: Searching
4.14.0. Tutorial: Toolbar Search
4.14.1. Tutorial: Keyboard-Driven Search and Replace
4.14.2. Tutorial: Search Tool
4.14.3. Tutorial: Search in Files
4.15. Tutorial: Other IDE Features